How The Titleist U500 Irons Are Built
Discover how the Titleist U500 irons are built on tour


How The Titleist U500 Irons Are Built - We speak to Karl Arthur on the Titleist Tour Truck who shows us how the U500 utility irons are built for the world's best players
How The Titleist U500 Irons Are Built
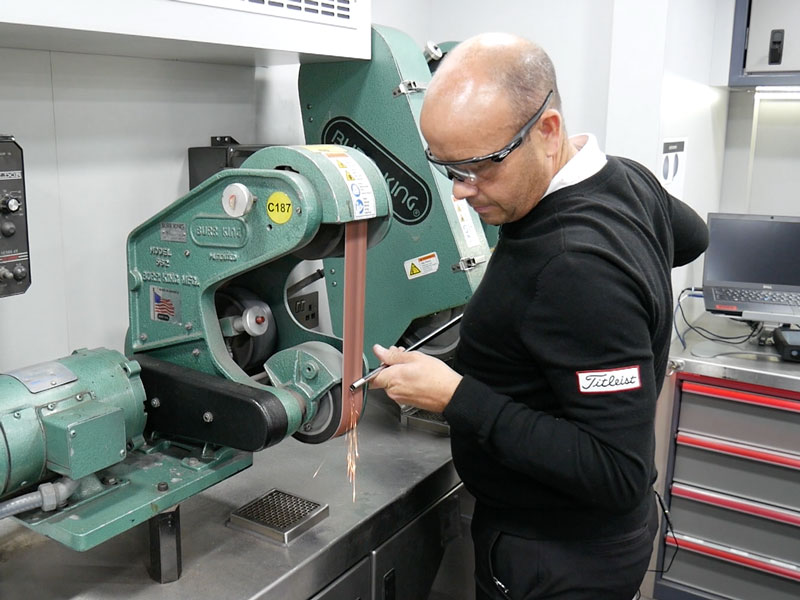
We were lucky enough to catch up with Karl Arthur on the Titleist Tour Truck during the Irish Open to follow the process of how the Titleist U500 utility irons are built for the tour players.
Step 1 – Shaft roughing The tip of the shaft is placed on the roughing belt. This takes the chrome finish off the end of the shaft which makes it easier for the head to be glued to it securely.
Step 2 – Shaft cutting The shaft is measured and then cut to the correct length using a circular saw.
Step 3 – Grip application The grip is applied using white spirit and the appropriate number of layers of double-sided tape depending on what the player has requested. Some players ask for different layers under each hand based on their feel preferences.
Step 4 – Swing weight check At this point it is important to check the swing weight is just under the end target weight to allow for the weight of the glue required and hot melt being injected at a later stage.
Get the Golf Monthly Newsletter
Subscribe to the Golf Monthly newsletter to stay up to date with all the latest tour news, equipment news, reviews, head-to-heads and buyer’s guides from our team of experienced experts.
Step 5 – Glue the head Using a special two-part epoxy, the clubhead is glued to the shaft and then left to dry for around 10 minutes.
Step 6 – Ferrule buffing The plastic ferrule is buffed using a low abrasion, denim style belt to create a smooth finish on the ferrule and so it sits flush to the clubhead.
Step 7 – Loft and lie angle check Titleist’s new loft and lie machine for 2019 uses a camera that looks at the scorelines on the face to provide more accurate loft and lie measurements.
Step 8 – Hot Melt A tacky Hot Melt material is inserted into the clubhead via the toe to optimize the weight, improve the sound and feel and also collect any dust that may have found its way inside the head, which could cause it to rattle. A pin is then inserted to cover the hole and a final clean ends the building process.
Be sure to follow Golf Monthly on Facebook, Twitter, Instagram and YouTube for all the latest equipment news and reviews.

Joel has worked in the golf industry for over 15 years covering both instruction and more recently equipment. He now oversees all equipment and video content at Golf Monthly, managing a team of talented and passionate writers and presenters in delivering the most thorough and accurate reviews, buying advice, comparisons and deals to help the reader or viewer find exactly what they are looking for.
One of his career highlights came when covering the 2012 Masters he got to play the sacred Augusta National course on the Monday after the tournament concluded, shooting a respectable 86 with just one par and four birdies. To date, his best ever round of golf is a 5-under 67 back in 2011. He currently plays his golf at Burghley Park Golf Club in Stamford, Lincs, with a handicap index of 3.1.
Joel's current What's In The Bag?
Driver: Titleist GT3, 9°, Fujikura Ventus Black 6 S shaft.
Fairway wood: Titleist TSR3, 15°
Hybrid: Titleist TSi2, 18°
Irons: Titleist T150, 4-PW
Wedges: Titleist Vokey SM10, 50°, 54° and 58°
Putter: LAB Golf DF3
Ball: 2025 Titleist Pro V1x
-
 Did You Know The Masters Leaderboard Was Inspired By Fenway Park?
The Masters leaderboards are an iconic and historic part of the Augusta National Major, but did you know about its origins and how it operates today?
By Matt Cradock Published
-
 Why The 16th Pin Has Been Moved From Its Traditional Spot For The Masters Final Round
The 16th pin at Augusta National is in an different position that normal for the final round of The Masters, but why is that?
By Mike Hall Published